
Showing posts with label crooked knife. Show all posts
Showing posts with label crooked knife. Show all posts
Monday, October 15, 2012
WIP: Salad Serving Utensils
For this project I'm using my Frost's Mora crooked knife, and my little Brusletto whittler. Both utensils are from the same piece of birch, which accounts for the identical sway in their handles.


Sunday, August 21, 2011
A teaspoon for Sarah
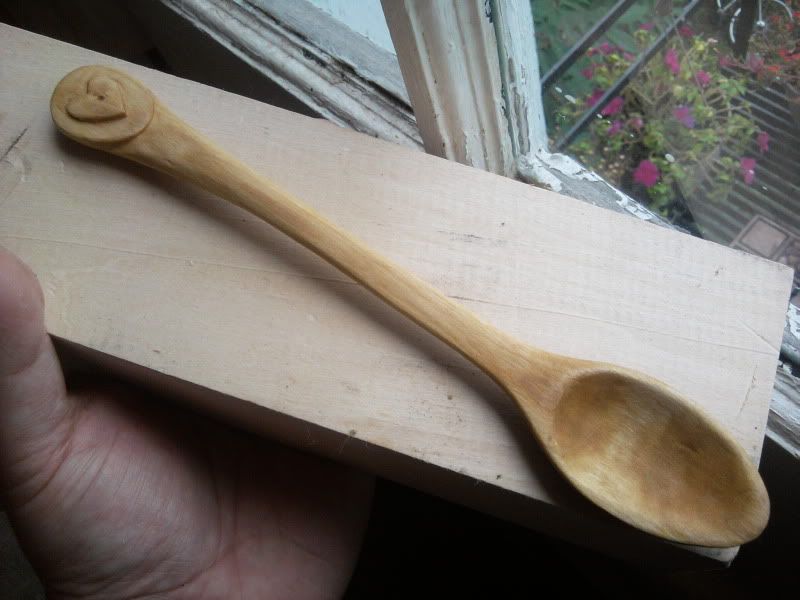
Our friend Sarah should be surprised by this teaspoon. It's not her birthday or any "special" occasion, but that's always been my favorite time to bring a gift to a friend.
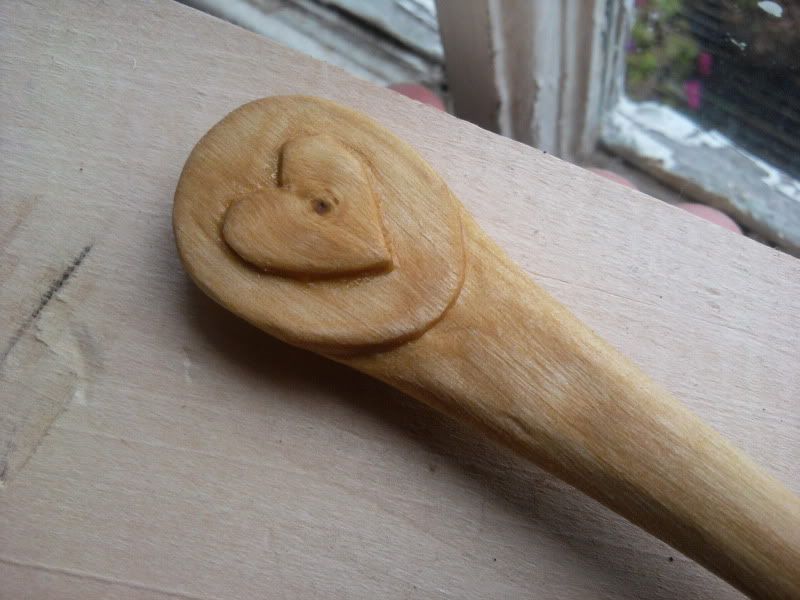
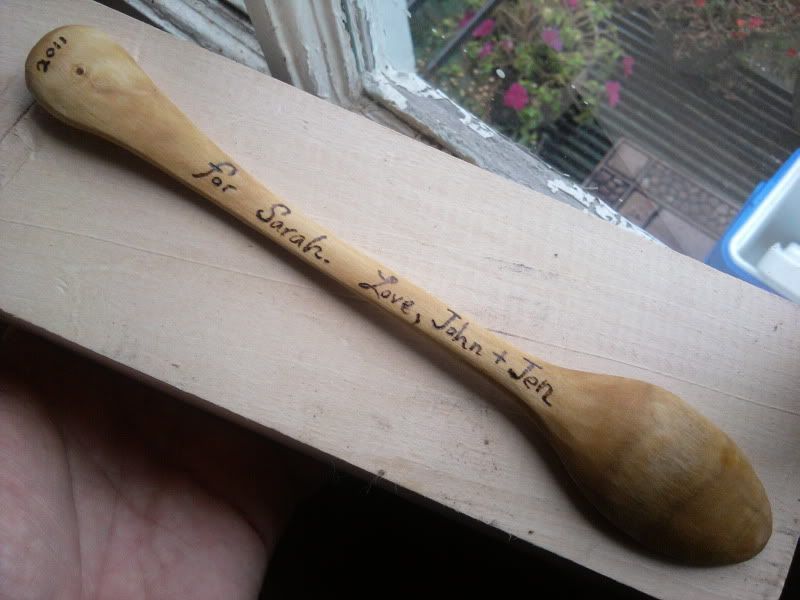
I carved this spoon from birch using only my crooked knife "Svanhild," and finished it with a soak in salad bowl finish and a topcoat of butcher block oil. The dedication was applied with a woodburner.
Friday, August 5, 2011
Keeping the crooked knife sharp
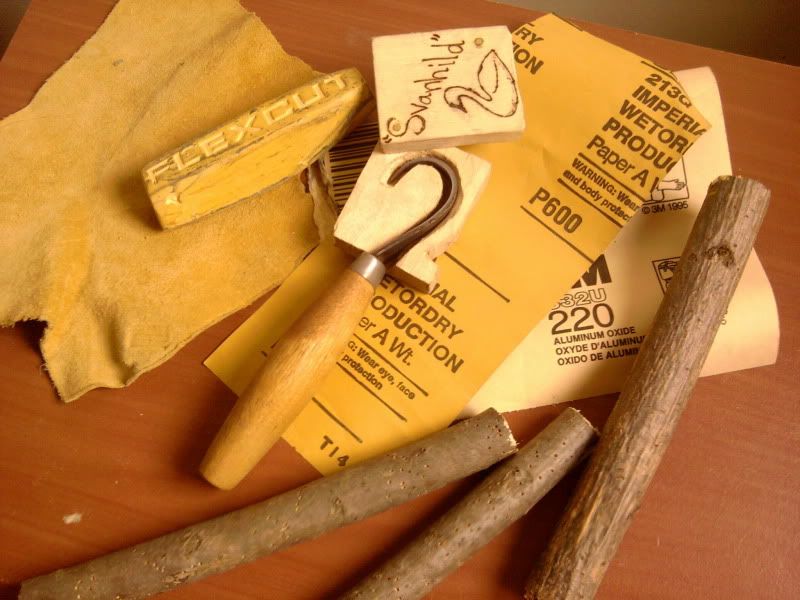
The crooked blade is extremely helpful when carving concave shapes such as those needed for bowls and spoons. Unfortunately, this helpful shape can be tough to sharpen on traditional sharpening stones. The best solution is to make the sharpening gear fit the blade shape. Here's what I use, and how to make your own.
First, gather the items seen in this first photo. You'll need:
-scrap of leather
-polishing compund (I'm going with Flexcut Gold, but jewler's rouge or the like will work too)
-sandpaper of varying grits (here I'm using 220 and 600 wet/dry)
-three straight sticks about the size and shape of the inside curve of the knife blade
-stapler with staples
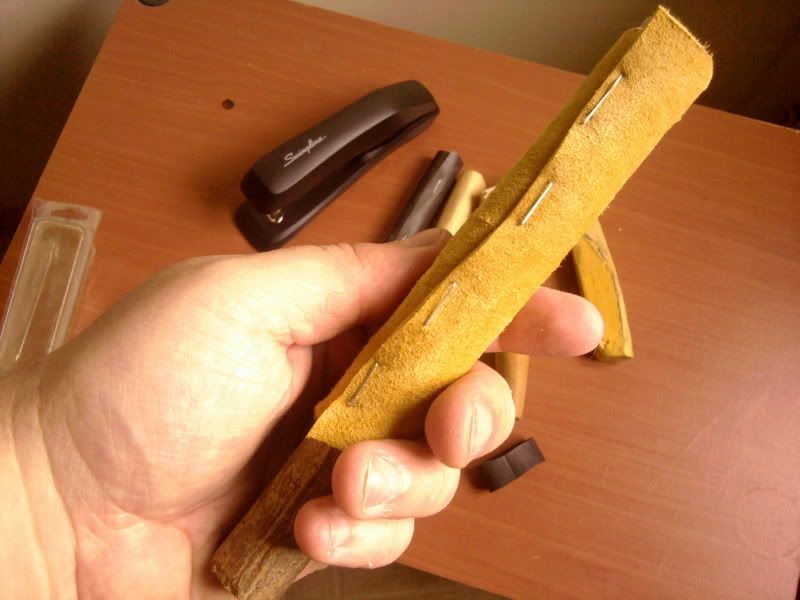
Cut the leather to wrap once around a stick, fuzzy suede side out, then staple it in place. I used a basic office stapler, but I suppose a staplegun would be even better. Apply some of the polishing compund to the leather. Do the same with the sandpaper on the other two sticks, only without any polishing compound. You now have two sharpening sticks and a strop for your crooked knife!
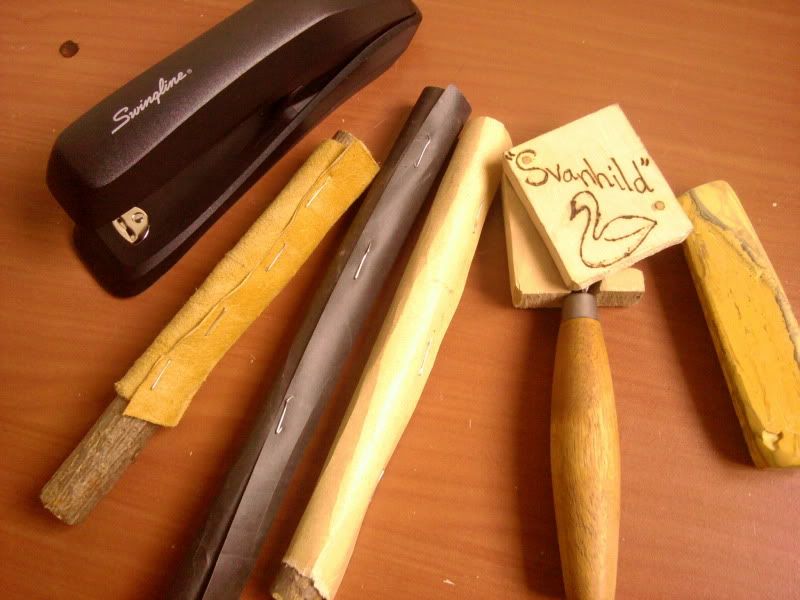
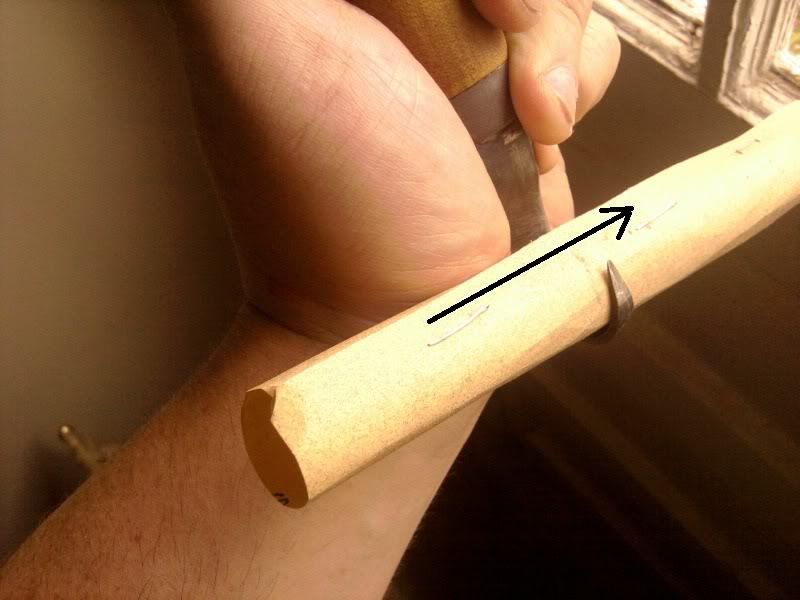
When using the sharpening sticks and strop, wipe them down the blade from spine to edge. Only go in this direction. Start with the coarsest stick first, then the next finest, and finally polish with the strop.
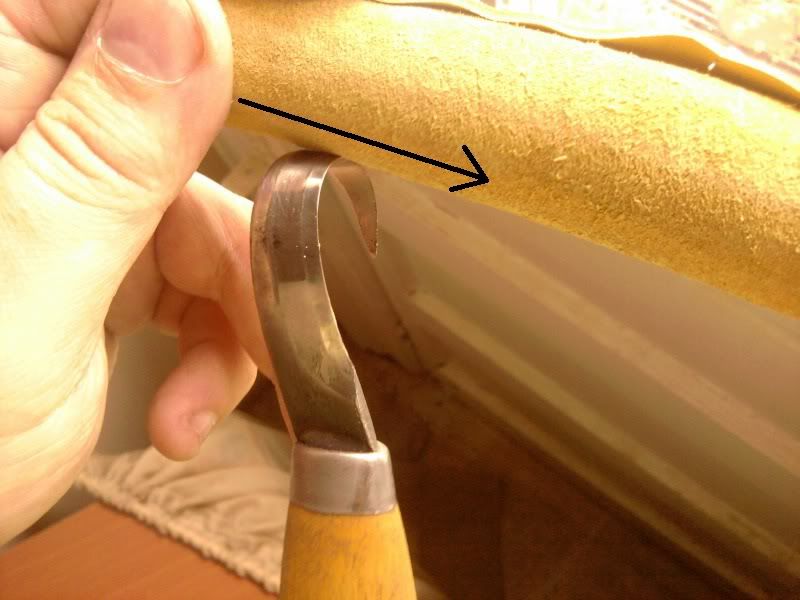
When you're done, the edge should be nicely polished and sharp enough to remove arm hairs. Careful now!
Friday, July 8, 2011
The Cracked Spoon


Wood never quits. It can be a stubborn material to work with, and despite our efforts to steam, carve, chop, and saw it into shape, wood has a plan all it's own. Halfway through carving this spoon I knew it was going to split right at the bowl. I decided to continue anyway, figuring it would be a learning experience. The crack is hardly noticeable. Besides, there's beauty in the broken, right? Wabi sabi I think it's called? Sure.
Monday, June 13, 2011
"Svanhild," my crooked knife


A crooked knife is just the thing for carving spoons, bowls, kuksas, and anything which requires a depression or concave shape. Mine is a Mora #164 full curve carving knife which I ordered from Ragweed Forge. The handle is plain wood, stained only by the dirt and perspiration that comes with use.

I made the little blade protector seen here. Tired and slightly embarrassed by my improvised sheath of cardboard and duct tape, the crooked knife demanded a proper home. I whipped this guard up from some scrap basswood and two small lengths of dowel, drilling the holes with a cordless Dremel tool. The hinge dowel, located upper left, is lubricated with a few drops of melted beeswax. The name and swan design were applied with a woodburner.

Friday, May 7, 2010
Tex Mex Pepper Spoon
John's Tex Mex just had it's Cinco De Mayo party, and I hate to show up empty-handed. Here's the gift I made.
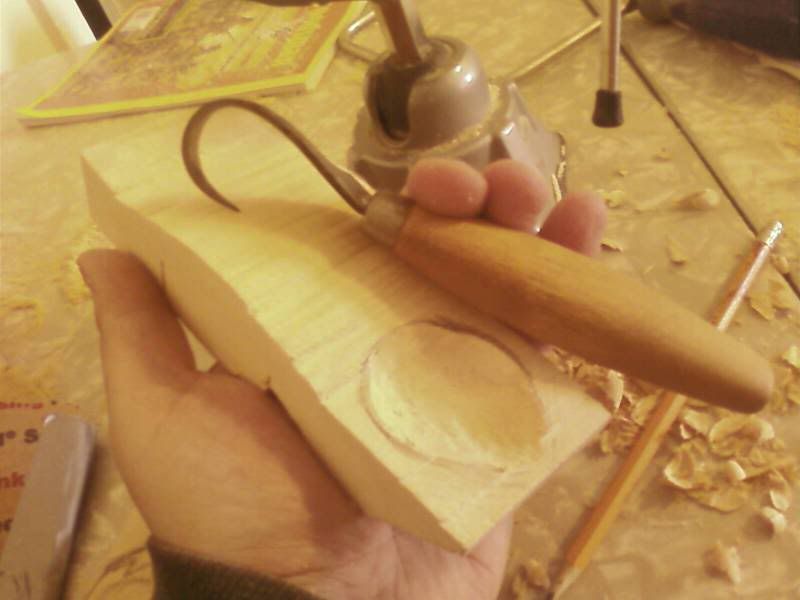
First I cut the piece to size with a coping saw, and carved out the bowl with my crooked knife.

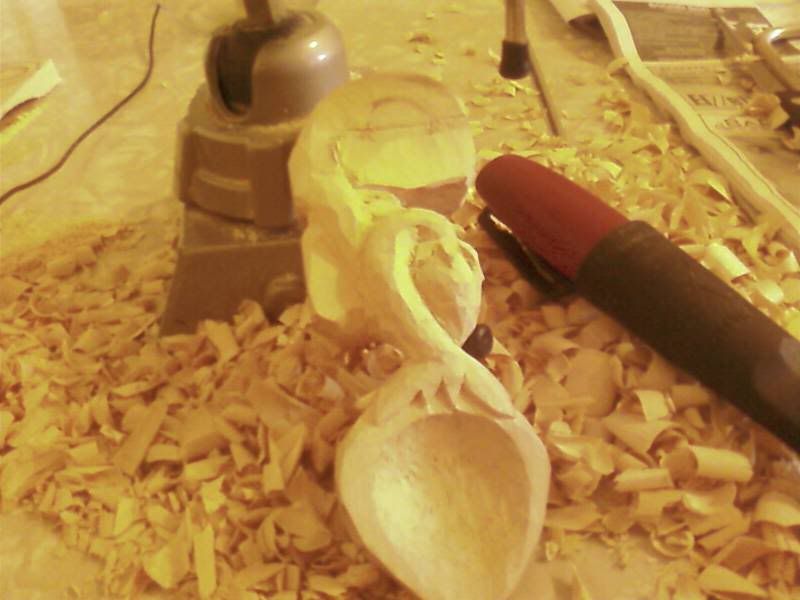
The bulk of the carving was done with a Mora knife.

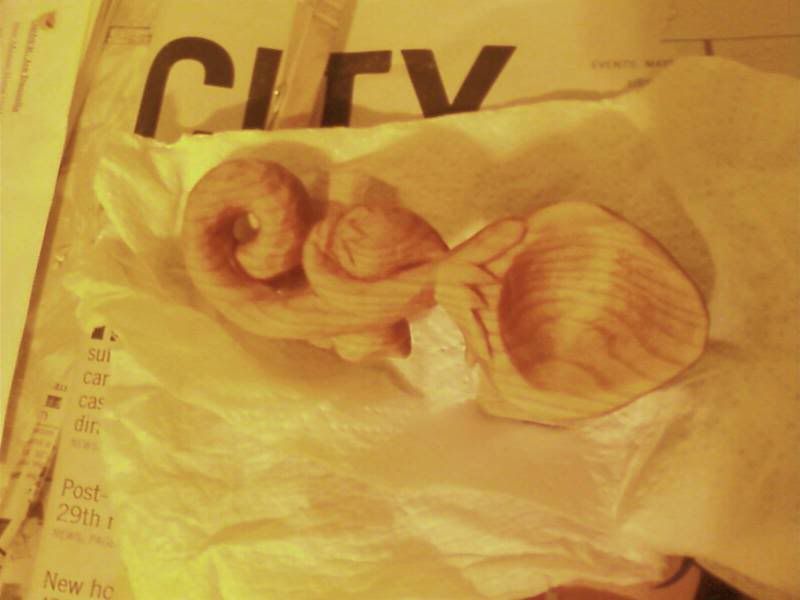
The carved and sanded spoon after a long soak in boiled linseed oil. This really brings out the grain. Compare with the above pic where the wood is almost white, and no grain is visible.

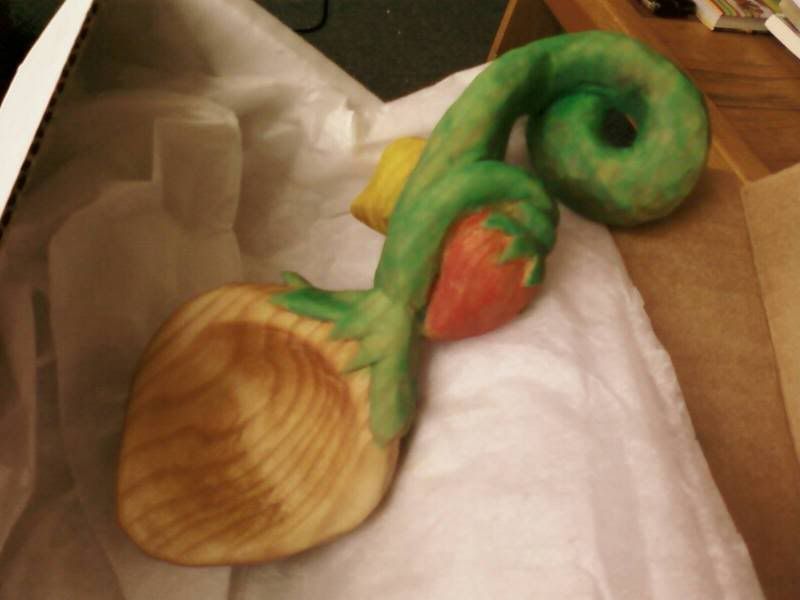
The final product, after adding some color with an acrylic wash. I decided to leave the largest "pepper" wood colored.

First I cut the piece to size with a coping saw, and carved out the bowl with my crooked knife.
The bulk of the carving was done with a Mora knife.
The carved and sanded spoon after a long soak in boiled linseed oil. This really brings out the grain. Compare with the above pic where the wood is almost white, and no grain is visible.
The final product, after adding some color with an acrylic wash. I decided to leave the largest "pepper" wood colored.
Subscribe to:
Posts (Atom)
