Showing posts with label birch. Show all posts

Thursday, March 13, 2014

Hand-carved Wedding Favors

In an effort to give our wedding and reception a personal touch, I decided, with my bride-to-be, to carve wooden hearts for all of our guests.  Even a smaller-sized wedding can have quite a few guests. Our count was around 70, or just under, which still calls for a lot of whittling.

I used all kinds of wood, from cedar to pine, basswood and poplar, and even mahogany. Some I finished with oils and shellac, some I left natural. All the hearts were marked with our wedding date using a wood burner.

Sunday, October 21, 2012

Rustic spoon rack w/Serving spoons

Inspired by the carving work of Simon Hill (which is always inspiring,) I went ahead and threw together my first spoon rack. It's rough, it's rustic, but it works. I used cherry for the rack, and green willow for the handle. The salad serving utensils are birch.

Wednesday, October 17, 2012

A little green paint, and my new whittlin' knife is all done!

Oil paint can take a while to dry, but I'm very happy with how this turned out. I hit the high areas of the knife marks with some sandpaper, giving the paint a time-worn look. A thin layer of shellac protects the paint nicely.

Monday, October 15, 2012

WIP: Salad Serving Utensils

For this project I'm using my Frost's Mora crooked knife, and my little Brusletto whittler. Both utensils are from the same piece of birch, which accounts for the identical sway in their handles.

Friday, October 12, 2012

Taking my newly-handled whittlin' knife for a test drive

My new knife carves beautifully. Mora blades always sail through wood, and I'm pleased with the handle I carved and fixed to the steel. The blade is set straight and strong, while the handle is nice and comfortable. I've experienced no hot spots, and no "dangling pinky" effect, since this handle is longer than most. Next I plan to give the handle some color with a little oil paint.
For a test run, I carved some hearts(while my MereWere robot coffee mug looks on.) The wood used is birch from the same piece as the knife's new handle.

Monday, October 8, 2012

A hand-carved handle for my carving knife!

Here's my second attempt at giving this blade a handle. The first try, seen here, was a failure. The wood is birch, donated from my a tree in front of my parent's house. The steel is a Frost's Mora, purchased from Ragweed Forge. I made the handle more substantial this time, both wider and longer, while retaining a neutral shape which gives the opportunity for a variety of grips. Plus, the longer handle gives me more room for a full grip when doing hours of full-arm cuts (aka spike troll carving!)
I've always wanted a carving knive with a longer handle, and here it is!

Wednesday, October 3, 2012

Work in progress: Wizard walking sticks in birch

Another quick update here, as I'm in the process of completing several projects. These walking stick wizards are being carved from birch (donated from my mom & dad's birch tree.) You can see some pencil lines where I'm plannign to cut, most notably the eyes but also some lines for the definition of the wizard's beard hair.

Tuesday, September 18, 2012

How to: Whittle some Spike Trolls

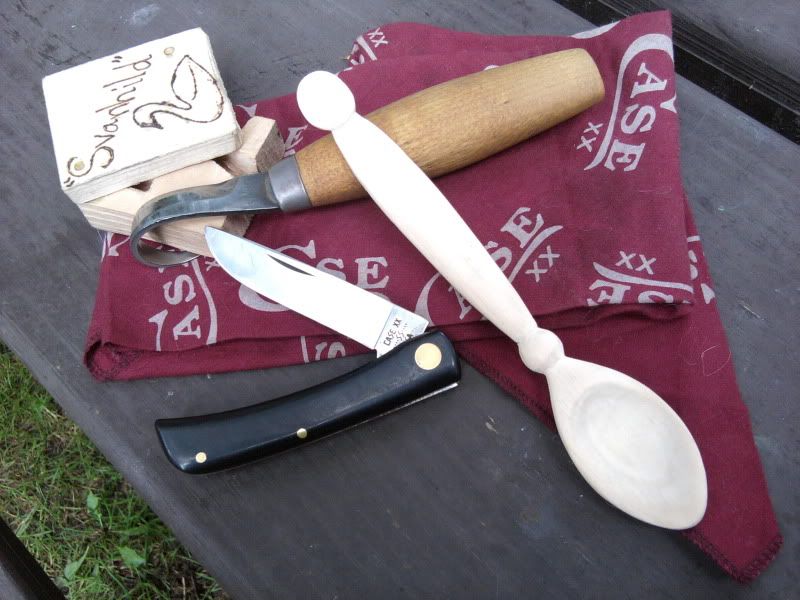
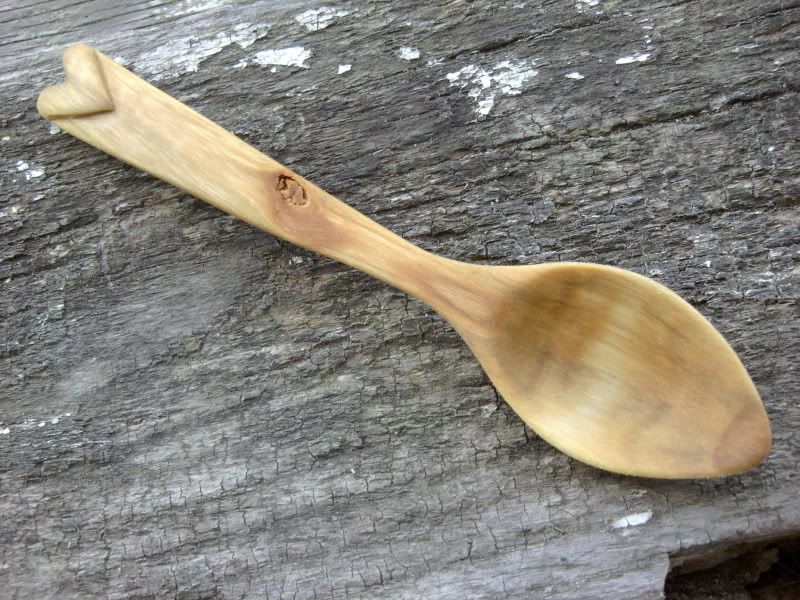
Spike Trolls (a rough translation of spiketrollet, aka "carved trolls"), are a quick and easy project for whittlers of any experience level. You get to try a variety of grips, practice your cuts, and make something cute out of material you can find anywhere. Here's how I do it, step-by-step: 1. Start with a stick of green wood, as big around as your thumb. The base end should be cut flat enough to support the spike troll on an even surface.
2. Define the "hat" area by shaving up from the hatband to the top of the stick.
3. Shape the "hat" into a general cone shape, allowing for curves if you'd like.
4. Make a stop cut for the top of the "face." Shave bark towards this line to define the forehead area.
5. Complete the face area by carving a shallow notch up to the forehead stop cut.
6. Shape the "hat"as desired. I like to carve smooth notches representing folds in the hat.
7. Draw the face with a Sharpie.
8. Color the hat if desired. I use acrylic paints.
9. The final step, of course, is to make your new spike troll a buddy!

Wednesday, June 13, 2012

Destroy it and start over!

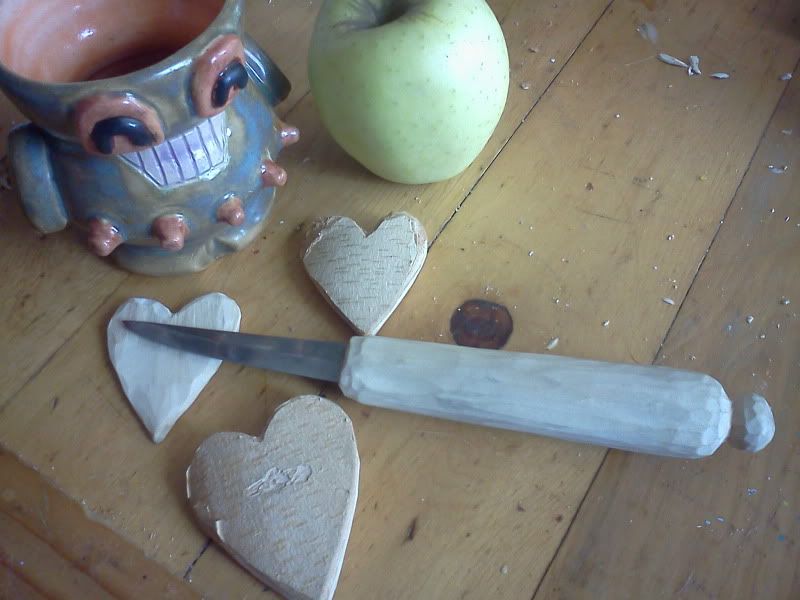
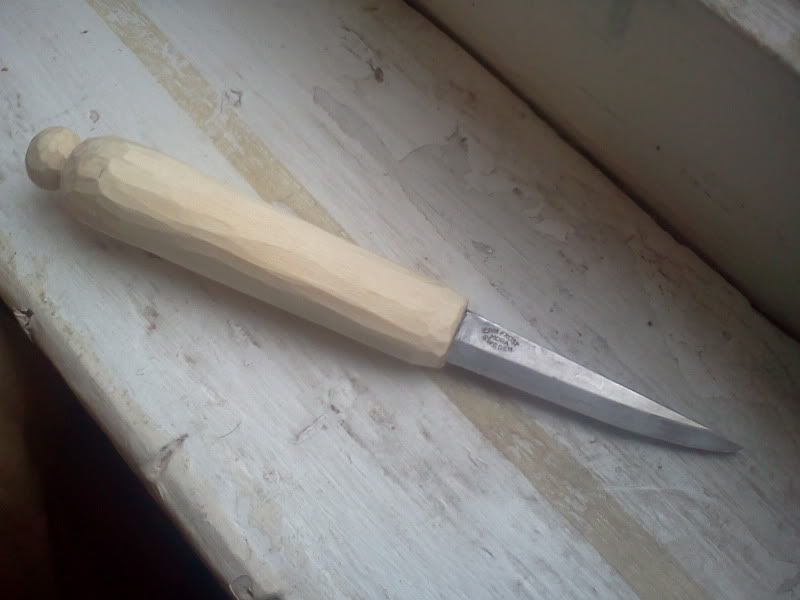
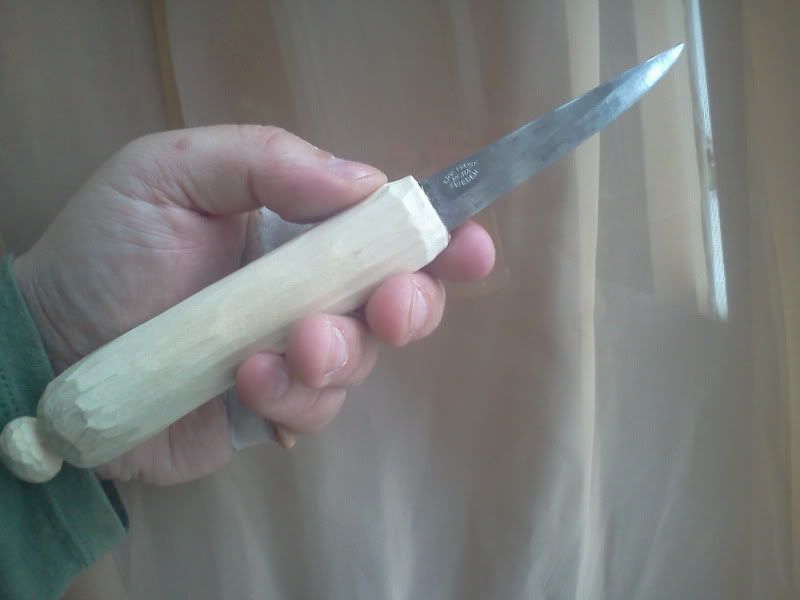
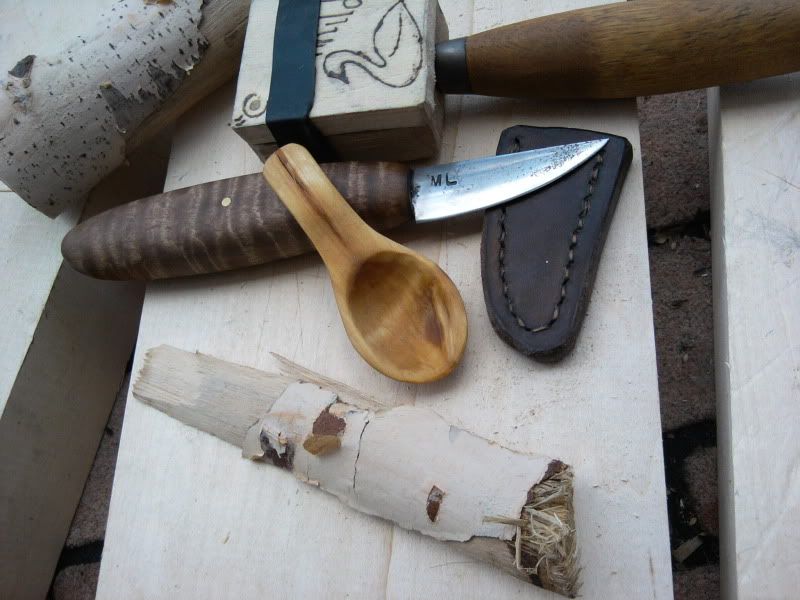
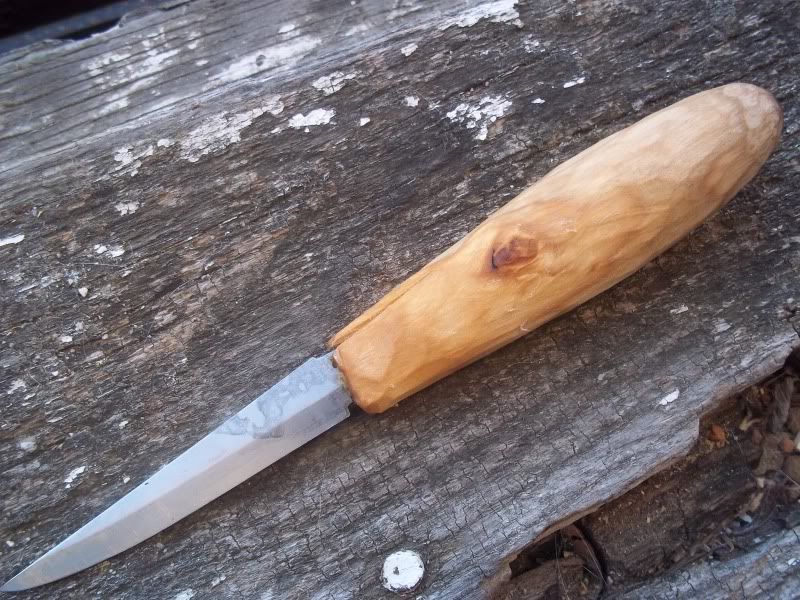
I've always wanted a carving knife with a hand-carved handle. The idea here is to leave strong "whittle marks" and show an overall rustic appearance. I ordered a Mora knife blade from Ragweed Forge, and it got to me in two days time. Using some birch my dad gave me, I carved up a nice, comfortable grip in the Swedish tradition. I drilled a hole deep enough for the tang, then pounded the blade into the wood.
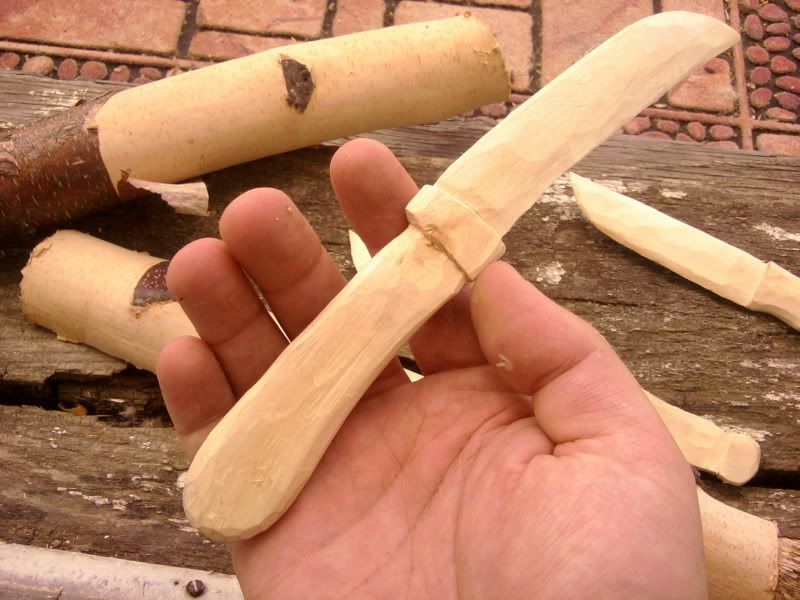
 Oops! 
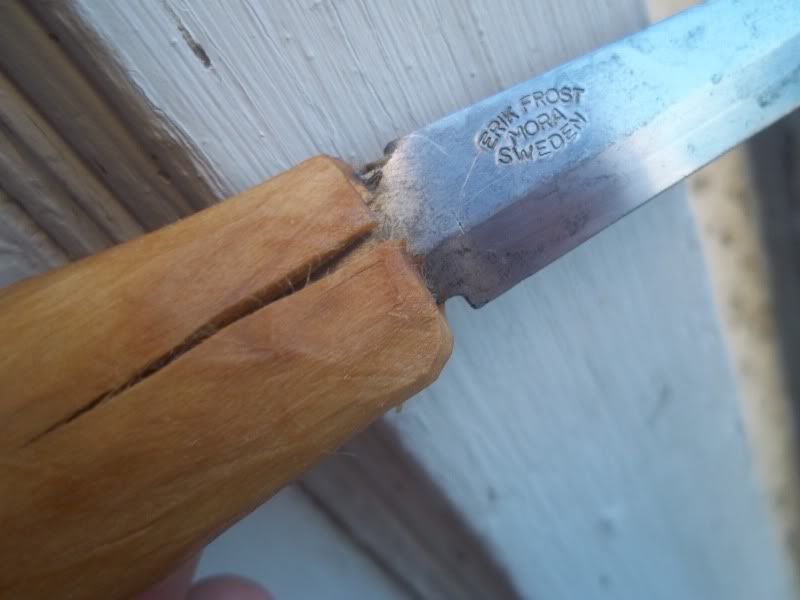
Too much force, not enough measuring. I had failed to account for the flaring of the tang just before the blade starts, and split the wood. 
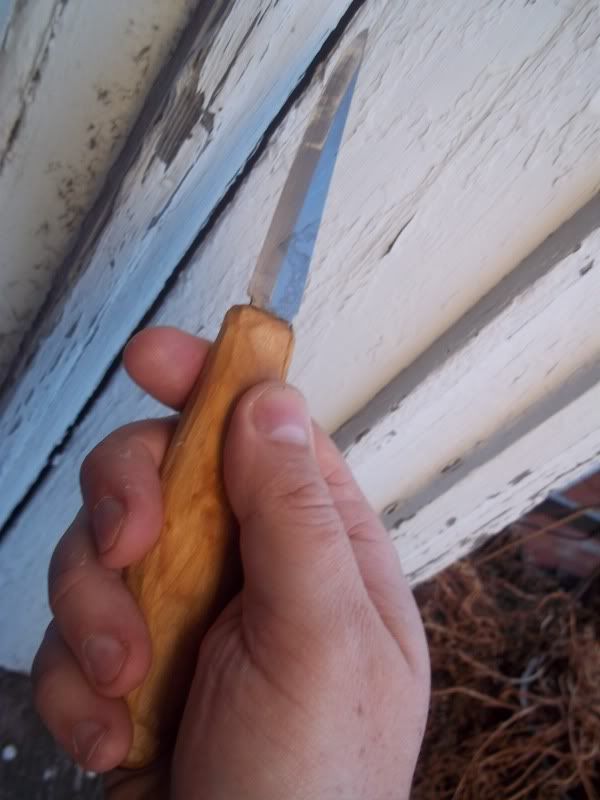
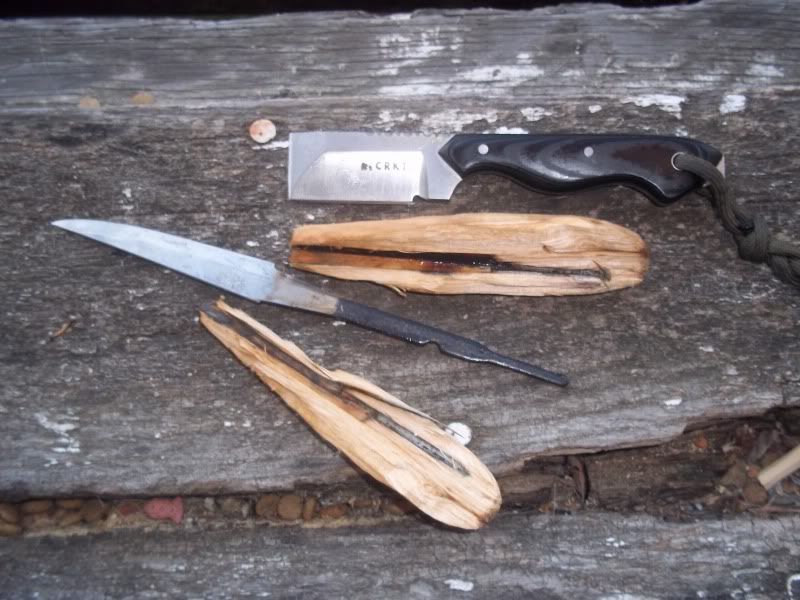
I knocked the failed handle off with my chisel-like CRKT Razel, and headed back to the drawing board.

Wednesday, August 31, 2011

Carving While Camping


This past weekend saw me camping out at Letchworth State Park, known as "The Grand canyon of the East." It's a beautiful place, and every visit seems better than the last.


Between hikes, cooking, and just relaxing, I managed to carve a pair of spoons. The wood used was birch.


If you have the chance, give Letchworth a visit! I plan to get back there very soon.


Thursday, August 25, 2011

Two birch teaspoons


Aah, the difference a stain makes! These spoons are both whittled from the same piece of birch wood. I stained the darker spoon with salad bowl finish, while the lighter one has a coat of clear finish.

Sunday, August 21, 2011

A teaspoon for Sarah


Our friend Sarah should be surprised by this teaspoon. It's not her birthday or any "special" occasion, but that's always been my favorite time to bring a gift to a friend.


I carved this spoon from birch using only my crooked knife "Svanhild," and finished it with a soak in salad bowl finish and a topcoat of butcher block oil. The dedication was applied with a woodburner.


Sunday, August 14, 2011

WIP: Wizard Face Walking Stick in birch


As woodspirits go, mine are carved a little deeper with an emphasis on long mustaches and beards. I see these guys as more wizards than spirits. This lighter colored one is birch, a wood I've found quite easy to carve.


I'll give it stain of some sort, though I do like how it looks right now. Maybe just a clear finish then? Either way I'll also cap the tip with either a flat or pointed metal piece. This one might have room for a lanyard too. I love the way the stick curves from the back of the head up to the top. It seems to provide a natural handrest.

Saturday, August 13, 2011

The tiny little birch kuksa


I'm having a blast carving this birch wood! This micro kuksa might end up a necklace pendant or maybe some sort of decorative ornament. It's smaller than a teaspoon, and the long handle lends itself to some sort of necklace attachment. It was whittled from birch and soaked in linseed oil. Displayed next to some untreated birch, you can really see the difference the oil makes.

Thursday, August 4, 2011

Birch spoons and letter openers


My friend Phil visited me recently, with a gift from my mom and dad: a pile of birch wood! My parent's front yard birch tree was starting to threaten the power lines, so dad did some pruning. I'm happy to report that everything I've read about this legendary wood is true.


I've managed to carve some spoons, a spatula, and even a few letter openers. The grain is straight to slightly curved, with a few small knots. Those knots and flaws I've found have been easy to work with.

These still need some drying, sanding, and staining.I'll use salad bowl finish or maybe butcher block oil. I plan to use the spatula and one of the spoons when camping with my dutch oven!

Thursday, November 11, 2010

Retired Navy vet carves the Declaration of Independence over the course of 10 years

Charlie Kested of Johnstown, NY, an 81-year-old US Navy veteran, used his scroll saw to cut this beautiful representation of The Declaration of Independence. The detail and accuracy are amazing.


God bless America, and many thanks to all our veterans!