I really like the traditional Dala horse. This one shows it's "whittle marks," the cuts left by a good sharp blade. The color is red acrylic with blue and white champagne bubbles.
Sunday, December 9, 2012
Wednesday, November 21, 2012
The other kind of carving
Carving wood or carving turkey, which is best? They both require patience and a sharp knife. Wood lasts longer, that's for sure!
Our Thanksgiving turkey comes from a little farm just down the road, and is never frozen. It's tasty, local,and big enough to last a good long time. I'm looking forward to weeks of turkey sandwiches, salads, soup, and more. I've sharpened the knives to a hair-popping edge, and am ready to go.
This year I'm giving thanks to God for so many things. My carvings are in the hands of those who appreciate the work, I have a beautiful and loving fiancé, a wonderful family, and more friends than I deserve or can count.
May those who read this have as much and more to be thankful for. Happy Thanksgiving!
Monday, November 12, 2012
Linked Hearts are up on Etsy
The linked hearts I posted about a little while back are now available on Etsy. I whittled them from a block of tupelo, then stained one with some "prarie wheat" gel stain. I like the contrast the color gives the piece, and am already planning a new linked hearts project.
Carved links are a classic old-time whittler's trick, and joined hearts are just classic.
Carved links are a classic old-time whittler's trick, and joined hearts are just classic.
Monday, November 5, 2012
A Dala horse, carved in the traditional style
I love the Swedish Dala horse. It's timeless style and durable design make it one of the great toys of the world.
My horses, though inspired by the Dala horse, are usually carved a slightly different way, with softer lines and different proportions. The traitional ones have straight legs, raised ears,and are normally painted in bright, solid colors, with the mane, tail, and saddle painted on.
My horses, though inspired by the Dala horse, are usually carved a slightly different way, with softer lines and different proportions. The traitional ones have straight legs, raised ears,and are normally painted in bright, solid colors, with the mane, tail, and saddle painted on.
Friday, November 2, 2012
Cthulu, whittled from ancient nightmares!
As a fan of horror fiction, especially the works of Poe, Howard, and Lovecraft, autumn always inspires meto watch scary movies and revisit my favorite stories.
Cthulu, one of HP Lovecraft's most iconic creations, stands among Dracula, Moriarty, and Darth Vader as one of the great opponents of all that is good. Represented here in a small basswood carving, one might actually believe he can be defeated.
I'm not sure if I'll paint this one, or maybe just give it a coat of linseed oil for a more defined look.
Wednesday, October 31, 2012
Wednesday, October 24, 2012
Dealing with sore hand muscles, cuts and calluses
Carving will change your hands. Your off-hand, or "support hand" as some like to call it, may collect litte cuts and scars. While your dominant hand, the one you use to hold the knife, axe, or other tool, will proudly develop calluses as a result of the friction of so many hours spent shaping wood. Both hands will grow stronger as you develop muscles you never knew you had.
For cuts, I keep a first aid kit close by. Working with knives has made me an expert at treating minor cuts. It happens less often than it used to, but I still make the occasional mistake which requires a band-aid or a spot of super glue.
For sore muscles, I do two things: hold a hot mug of coffee or tea, and take breaks for stretching. Like a runner stretches his or her leg muscles, a carver must stretch those muscles in the fingers and hand. This should be as routine as stropping your knife blades. At the end of the day, an application of Mineral Ice can help as well.
Steve Tomlin has some great advice on hand stretching and excercise. While you're over there, check out his amazing work in green woodcarving!
Sunday, October 21, 2012
Rustic spoon rack w/Serving spoons
Inspired by the carving work of Simon Hill (which is always inspiring,) I went ahead and threw together my first spoon rack. It's rough, it's rustic, but it works. I used cherry for the rack, and green willow for the handle. The salad serving utensils are birch.
Wednesday, October 17, 2012
A little green paint, and my new whittlin' knife is all done!
Oil paint can take a while to dry, but I'm very happy with how this turned out. I hit the high areas of the knife marks with some sandpaper, giving the paint a time-worn look. A thin layer of shellac protects the paint nicely.
Tuesday, October 16, 2012
Spike Trolls whittled from fresh green Willow
I lucked out and found some willow clippings in my neighborhood. The DPW never cleans up after themselves, and I'm more than happy to haul off some free carving material!
These little guys were a great way to experiment with the wood. I found this willow to be easy to carve, with no splintering at all.
Monday, October 15, 2012
WIP: Salad Serving Utensils
For this project I'm using my Frost's Mora crooked knife, and my little Brusletto whittler. Both utensils are from the same piece of birch, which accounts for the identical sway in their handles.
Labels:
birch,
brusletto,
crooked knife,
mora,
salad tongs,
spoon
Friday, October 12, 2012
Taking my newly-handled whittlin' knife for a test drive
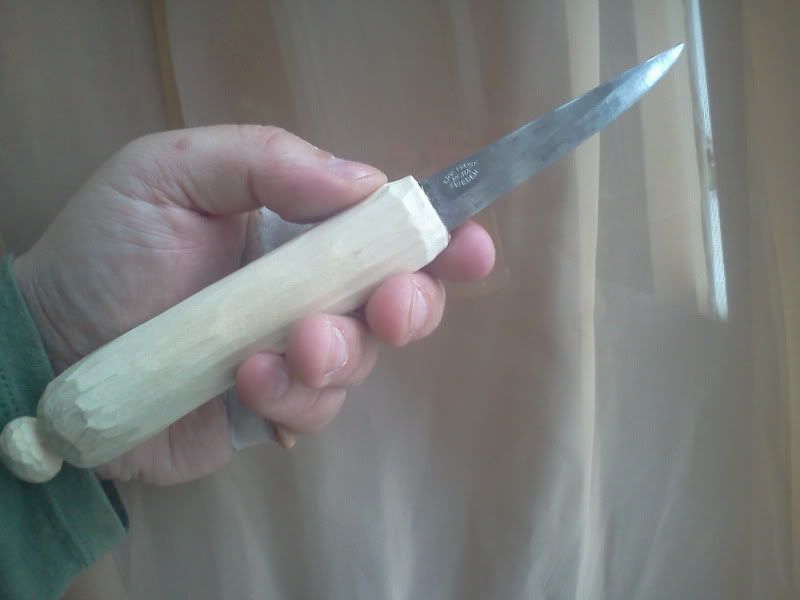
My new knife carves beautifully. Mora blades always sail through wood, and I'm pleased with the handle I carved and fixed to the steel. The blade is set straight and strong, while the handle is nice and comfortable. I've experienced no hot spots, and no "dangling pinky" effect, since this handle is longer than most. Next I plan to give the handle some color with a little oil paint.
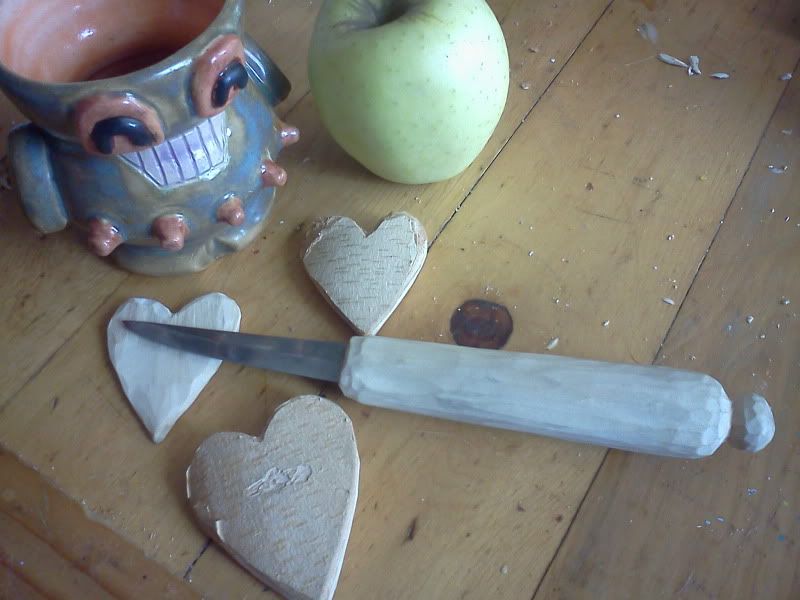
For a test run, I carved some hearts(while my MereWere robot coffee mug looks on.) The wood used is birch from the same piece as the knife's new handle.
Monday, October 8, 2012
A hand-carved handle for my carving knife!
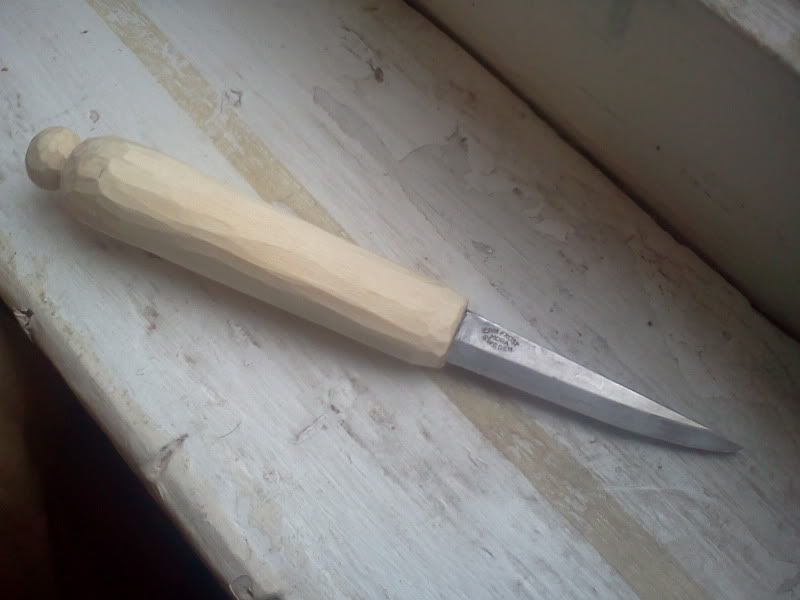
Here's my second attempt at giving this blade a handle. The first try, seen here, was a failure.
The wood is birch, donated from my a tree in front of my parent's house. The steel is a Frost's Mora, purchased from Ragweed Forge.
I made the handle more substantial this time, both wider and longer, while retaining a neutral shape which gives the opportunity for a variety of grips. Plus, the longer handle gives me more room for a full grip when doing hours of full-arm cuts (aka spike troll carving!)
I've always wanted a carving knive with a longer handle, and here it is!
Wednesday, October 3, 2012
Work in progress: Wizard walking sticks in birch
Another quick update here, as I'm in the process of completing several projects. These walking stick wizards are being carved from birch (donated from my mom & dad's birch tree.) You can see some pencil lines where I'm plannign to cut, most notably the eyes but also some lines for the definition of the wizard's beard hair.
Saturday, September 29, 2012
Thursday, September 27, 2012
Old time whittler's tricks: Cube in cage w/chain (part 2)
Just a quick update, since I've already posted on this carving. Here it is again, but with some boiled linseed oil hand-rubbed into the wood. As always, linseed oil brings out the character of the basswood. It imparts a warm glow, highlights the grain, and helps to seal the wood.
Labels:
ball-in-cage,
basswood,
chain,
links,
linseed oil,
whimsey
Tuesday, September 25, 2012
Old time whittler's tricks: Linked Hearts
Two hearts, carved from a single piece of tupelo wood. I like tupleo. It's easy to carve, but a bit tougher than basswood. I stained it two different colors to further the illusion of two seperate objects "magically" intertwined.
I made these thick enough to withstand causal handling, and chose tupelo for it's durability. People will want to pick this up, and I will want it to stay in one piece!
Tuesday, September 18, 2012
How to: Whittle some Spike Trolls
Spike Trolls (a rough translation of spiketrollet, aka "carved trolls"), are a quick and easy project for whittlers of any experience level. You get to try a variety of grips, practice your cuts, and make something cute out of material you can find anywhere.
Here's how I do it, step-by-step:
1. Start with a stick of green wood, as big around as your thumb. The base end should be cut flat enough to support the spike troll on an even surface.
2. Define the "hat" area by shaving up from the hatband to the top of the stick.
3. Shape the "hat" into a general cone shape, allowing for curves if you'd like.
4. Make a stop cut for the top of the "face." Shave bark towards this line to define the forehead area.
5. Complete the face area by carving a shallow notch up to the forehead stop cut.
6. Shape the "hat"as desired. I like to carve smooth notches representing folds in the hat.
7. Draw the face with a Sharpie.
8. Color the hat if desired. I use acrylic paints.
9. The final step, of course, is to make your new spike troll a buddy!
Labels:
acrylic paint,
birch,
face,
mora,
spike trolls,
teaching
Friday, August 31, 2012
Old time Whittler's tricks: cube in cage, with a wooden chain
Whittlin' really comes down to patience, experience, and skill, in that order. More than just about anything else, moving parts take special attention. It takes lots of tiny cuts in order to carefully remove certain areas, while preserving the parts you'd like to keep.
Whittling free-moving parts is very satisfying when it goes well, and a little heartbreaking when it does not. Break a link in your chain, and you might just discover a few brand-new curse words.
Labels:
ball-in-cage,
barlow,
basswood,
case,
case razor,
chain,
cube-in-cage,
hearts,
mora,
trick
Thursday, August 16, 2012
A Mahogany display for some Hand-Carved Mustaches
This mahogany block really took to boiled linseed oil. I love the way the oil darkens the wood, while giving it depth and sheen. To display both rows of mustaches I drilled the front row deeper than the back. This lets the back row sit up a little higher.
I carved a large handlebar mustache in low relief, then painted it black for contrast with the mahogany. I also added a circle of blackboard paint with a light blue border, on which I can chalk the price. The words "Hand-Carved" are applied to one side with a woodburner.
Labels:
acrylic paint,
display,
linseed oil,
mahogany,
mustache,
shellac,
stick,
whimsey
Subscribe to:
Posts (Atom)


