Friday, December 31, 2010

Carving the Dark Wizard (part 3) COMPLETED!


Here he is, in all his malevolent glory. I shortened the wizard's staff in order to see his face, and added a tiny little monster face to it. Acrylic paint and spray shellac helped finish this little guy.

As you can see in these in-progress pics, the staff as designed was too long. My buddy's 2-year old son should get a kick out of this. Now his soldiers have a villian to battle!

Tuesday, December 28, 2010

Carving the Dark Wizard (part 2)


Here's a little update on the Dark Wizard toy. After roughing out the general shape with a coping saw, I'm now in the main carving phase. I'm using my Mora 1241 for this project. It's a terrific scandi-ground knife with a good sized handle.

I can already tell the wizard's face might come out different from what I originally planned, but that's fine. I'll keep the staff, as well as the wavy-bladed knife. There's just something that says "bad guy" about that shape!

As a bonus, here's a couple of pics of a dragon I made as a Christmas present for the same boy. I based the design on the prows of old Viking dragon ships(but with all sharp points removed.) Soon the Dark Wizard will lead this monster into battle.

Monday, December 27, 2010

Canada meets New Mexico

Here's an order I did in time for Christmas.


The customer asked for a wooden hockey puck w/maple leaf design, and one of my dala horses in a New Mexico theme. The little girl who received these carvings has one parent from New Mexico, one who's Canadian. As always, all materials are non-toxic.

Once again I used my custom whittling knife from ML Knives. It's a pleasure to carve with.

Sunday, December 19, 2010

Horses for Christmas


Here's a couple of toy horses I'm carving for a Christmas order. I've stained them with a few coats of salad bowl finish, and painted the details with acrylic paint.


I like this design for it's durability. The horses I've previously made have been chewed, thrown, kicked, and dropped. All the trials a little boy or girl can put a toy through. These things are tough!

Friday, December 17, 2010

Bench Strop


This strop will replace the short little slipstrop I've been using. Construction couldn't have been more simple. I made it from basswood, scrap leather, and superglue. I did a little abstract carving on top just for fun, and added a leather braid. I'm using Flexcut polishing compound on the leather.

This should help keep my blades shaving sharp!

Wednesday, December 15, 2010

New Items on Etsy


Sunday's show was great, but there's a few items that didn't sell. I've posted some on Etsy and will post more tonight and tomorrow. Hopefully these will help round out someone's last minute Christmas list!

Sunday, December 12, 2010

Hearts & Crafts Winter show


Today's craft show was a success! From 11am to 5pm at Java's, Rochester NY, myself and about 15 other vendors (correction: 24 vendors!) showed our wares. I'd like to thank everyone involved in the show, especially Lisa and Marisa, the ladies responsible for organizing the event. It was a good time, and many of my carvings are on their way to new homes.


Table space was limited due to this being an indoor show in the cozy confines of a coffeehouse. To capitalize on this, I threw together a vertical display rack from a telescoping wreath hanger and some 8-gauge wire. Tan duct tape did the holding. The contraption worked like a charm.


Sunday, December 5, 2010

Turning old spools into new bottle stoppers


I've found old wooden spools to be a good medium for carving faces. The spools here are carved then soaked in BLO. I've attached these to pre-shaped corks with dowels and glue. It turns out these guys are just the right size for bottle stoppers, and will wait patiently upside-down while you top off your glass.

Monday, November 29, 2010

Carving The Dark Wizard (part 1)

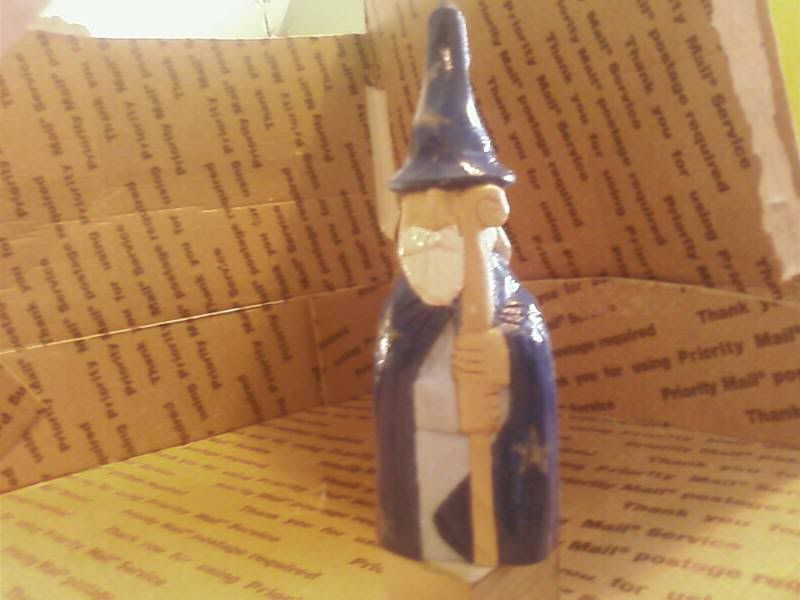
This first photo is my basic idea for The Dark Wizard, a companion piece to an ongoing project. Step one is putting pencil to a piece of wood. I'll post updates as the figure progresses.


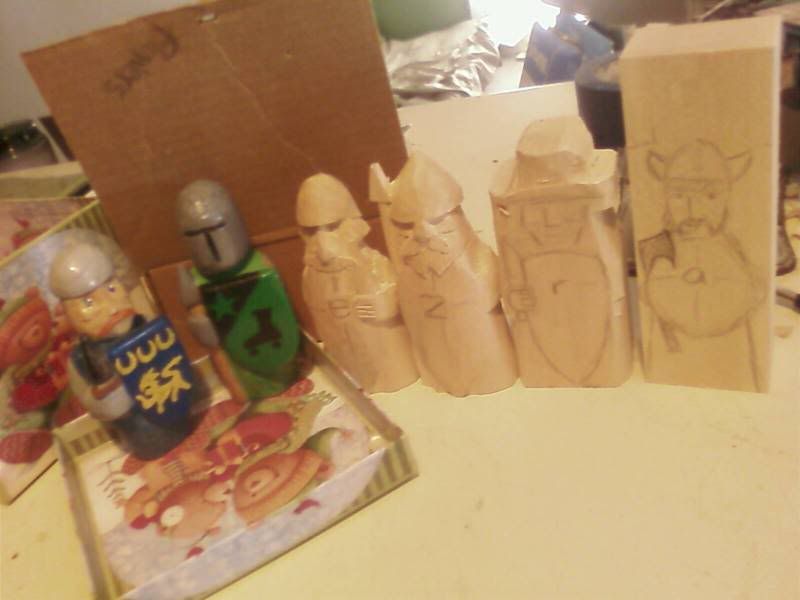
Last year I carved some toys for my best friend's son, a group of soldiers and knights I dubbed "Ezra's Army." I based the design for these little guys on the Lewis Chessmen, a design I admire both for it's history and it's robust form. I wonder if those medieval chesspiece carvers had "childproof" in mind?


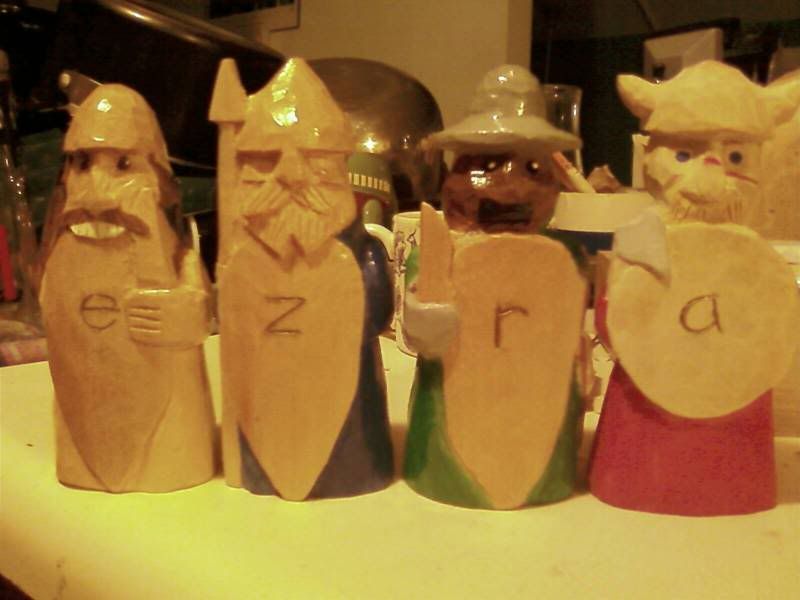
Last Christmas saw six soldiers form the core of this tiny army, and The Blue Wizard enlisted on Ezra's first birthday. I'm considering adding a dragon to the mix...


Also, I'd like to thank Albert Rasch for mentioning me in a recent blog post! I really enjoy his writing, and strongly recommend The Rasch Outdoor Chronicles. Do yourself a favor and give it a look!

Thursday, November 18, 2010

Blue Hat Santa


I like seeing the color blue in Christmas ornaments. The usual greens and reds are fine, but blue is a great change of pace. This Santa wears a blue hat with a white ball on the end, and no white brim. I'm really getting into carving these wooden eggs!


Tuesday, November 16, 2010

Update: Christmas ornaments

My first Santa ornament is done, as is the first Cabin-in-the-woods ornament for this year. I finished the Santa with linseed oil, acrylic paint, and some clear spray finish. The Cabin ornament is left more natural, with only a little paint and some clear coat on the trees and snow.

A brass eyelet is screwed into the ornaments' tops, where I'll eventually tie some ribbon to hang them by. Both are carved from wooden hobby eggs.


I have a few more of these on deck for Christmastime, as well as some other ornaments and hand-carved gifts. I'll make sure to post more pics when I can. Thanks for stopping by!

Thursday, November 11, 2010

Retired Navy vet carves the Declaration of Independence over the course of 10 years

Charlie Kested of Johnstown, NY, an 81-year-old US Navy veteran, used his scroll saw to cut this beautiful representation of The Declaration of Independence. The detail and accuracy are amazing.


God bless America, and many thanks to all our veterans!

Tuesday, November 9, 2010

Woodspirit Walking Stick

The woodspirit walking stick project is finished! I gave it a few coats of stain, a urethane clear coat to protect it, and a combination spike/rubber foot on the bottom. It is now ready for on- or off-road adventure.


This was a fun one to carve, and a learning experience as well.

Friday, November 5, 2010

Christmas Tree Cookie

Here's the Christmas tree cookie ornament all carved, sanded, and painted. I soaked it in linseed oil, then used an acrylic wash so the wood grain can show through.

Monday, November 1, 2010

Work in Progress: Christmas Tree Cookie

I'm working on a series of Christmas cookie carvings in time for the holidays. The first one up is a tree:

Thursday, October 28, 2010

New Items on Etsy

I've posted some new carvings on Etsy, including a small horse and some spike trolls. Have a look!

Wednesday, October 27, 2010

Works in Progress: Christmas Ornaments

Wooden eggs, found on etsy or at any hobby shop, can be great for carving. The quality of wood varies, but as a starting shape the egg is very versatile. This Santa carving uses the egg point down, while the cabin in the woods is egg point up. When these are done I'll attach a brass eyelet and some ribbon to each one.

Sunday, October 24, 2010

Work in Progress: Spool Face

Old wooden spools are great for carving. Mustache Dude here should be finished shortly.

Friday, October 22, 2010

Work in Progress: Walking Stick

I'm carving this woodspirit walking stick from a piece of pear, about 4' long. I'm leaving the bark on top for a grip. The spirit's beard wraps once around the staff. This project still needs to be sanded and stained, and I plan to add a metal spike/rubber stopper on the bottom. I'll update when it's finished.


(edited to add better photo)

Friday, October 8, 2010

The Figure Four Deadfall

I'm participating in a bushcraft skill challenge over on Blade Forums. Every day this month I will make a figure four deadfall trap. So far I've made one each day for a week, with all but one being successful. The carving demands are very basic. The figure four consists of three sticks and a heavy weight such as a rock or log. The three sticks are cut and notched, then set together under the heavy object. All four parts support each other. The weight rests on the diagonal (lever) stick, which pivots on the upright, and the lever pulls on the trigger stick, which is notched and rests against the upright. When the trigger stick is disturbed, the trap collapses and the deadfall crushes the target animal.


By the end of October this should be a well honed skill.

Tuesday, October 5, 2010

The NYT declares Scandinavian knives fashionable

I use Scandi knives almost exclusively when carving. I use traditional Moras and Bruslettos, which have a Scandinavian grind. My newest knife, an ML Knives whittler, is a convexed Scandi. The acute angle of the bevel really makes for thin slices and curly wood chips. Now approved by the Men's Fashion Section of the New York Times!


photo:Chikaka Harada

Friday, October 1, 2010

A Spoon for Mom

Here's a spoon I carved for my Mom. The wood is from a pear tree in my parents' yard. The carving process was fun, since it smelled just like fresh pears. After carving, I hand sanded the spoon and soaked it in salad bowl finish.